🛠️ Installation
This page logs the physical build of the Raspberry Pi server, step by step, with photos from each stage. It's updated as the build progresses — today covers cooling fan installation, SSD prep, and starting the OS flash. 🧑🔧
🏆 Sponsored by
Build supported by Brunel Cybersecurity Society 🎓 and the CyberTutor Platform 💻🔐.
📅 Day 1 Progress
✅ Completed today
- Opened the Raspberry Pi case and prepped the cooling fan kit
- Mounted the heatsink + fan and wired it to the GPIO pins
- Seated the SSD into the ORICO USB enclosure
- Connected the SSD enclosure to the Pi over USB
- Started flashing the OS onto the microSD card using Raspberry Pi Imager
🔗 Resources used today:
- 🎥 How to install the Raspberry Pi cooling fan correctly — YouTube walkthrough on fan/heatsink placement, referenced for Step 2 below
- 💽 Raspberry Pi Imager — official tool used to flash the OS onto the microSD card, referenced for Step 5 below
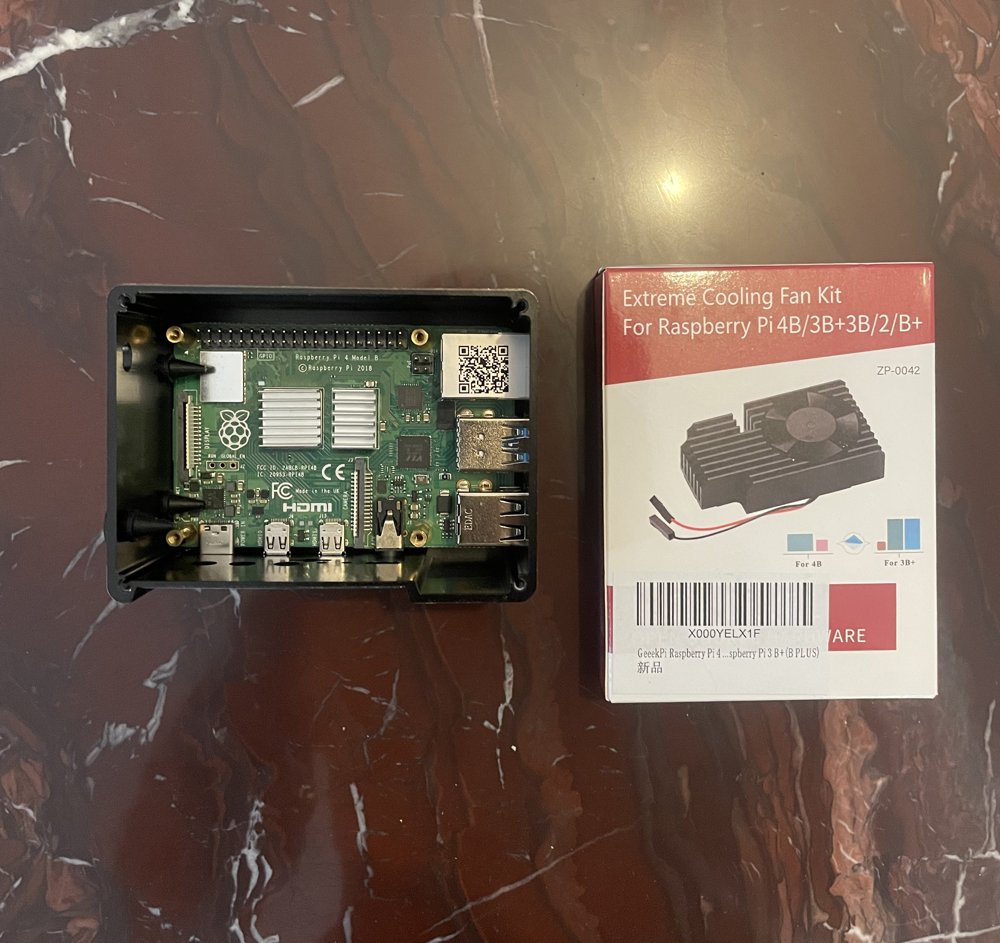
1️⃣ Unbox and open the case
The Pi 4 case was opened up and the GeeekPi Extreme Cooling Fan Kit was unboxed alongside it, ready for the fan to be installed before the board goes back into the case.
2️⃣ Mount the heatsink and fan
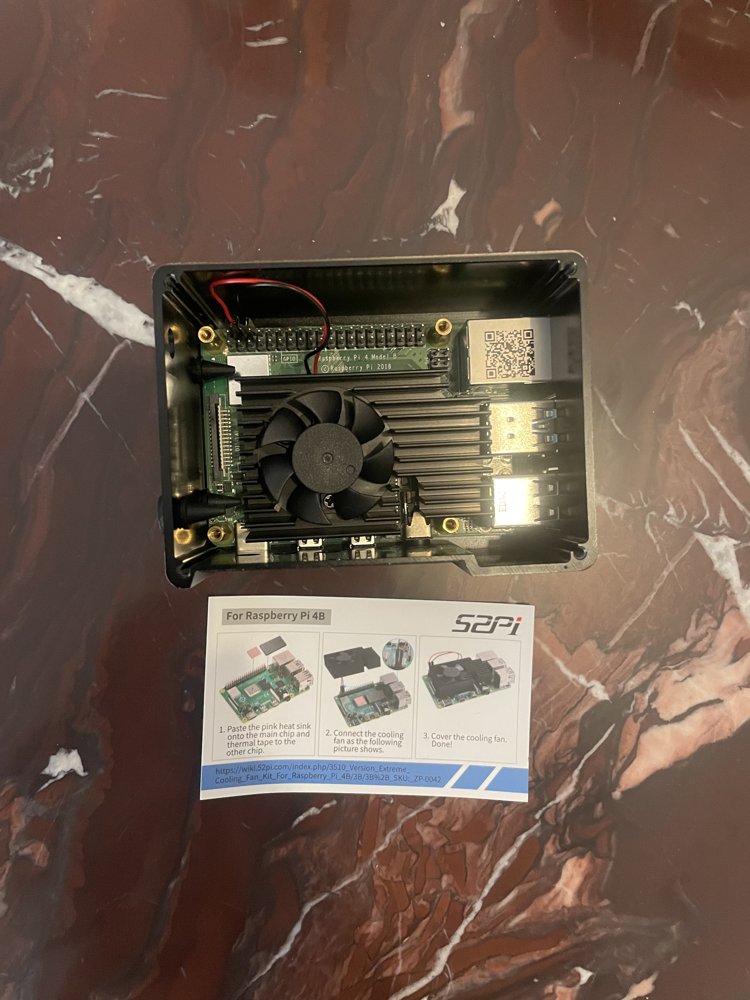
Following the kit's own instruction card (pictured below the board), the process was:
- Paste the heatsink onto the main chip (and thermal tape onto the smaller chips)
- Sit the fan on top of the heatsink
- Secure the fan bracket down over it
🔌 Wiring detail
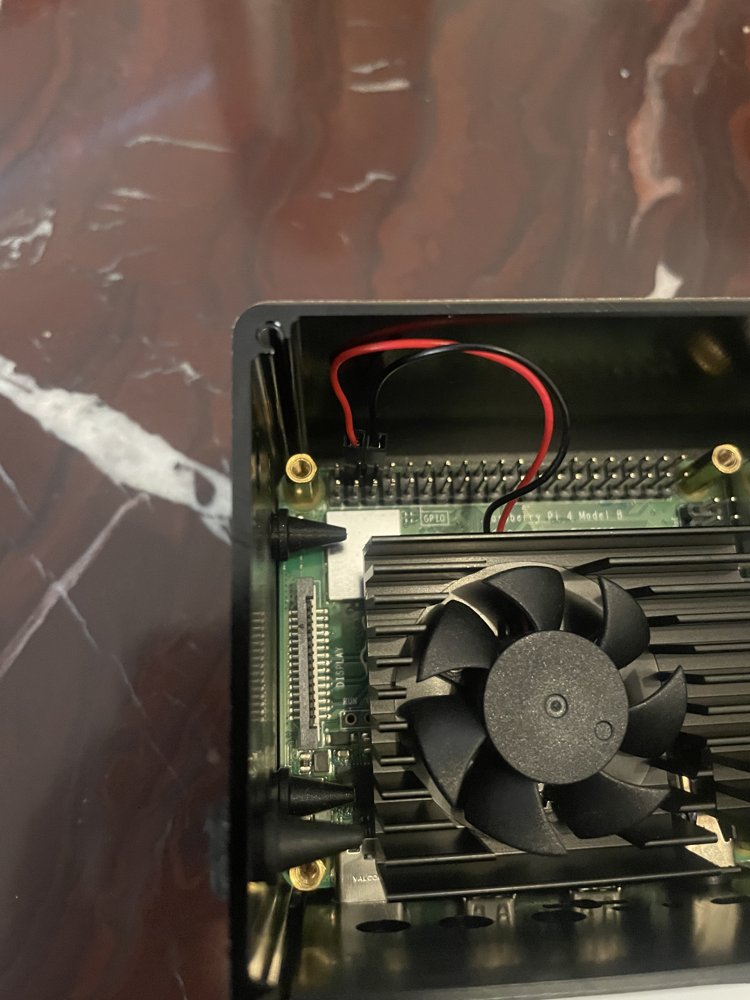
The fan's 2-pin JST connector (red = 5V, black = GND) plugs into the GPIO header. The important bit: the red and black wires need to sit next to each other, right after the first pin on the header — not spread apart, and not on the very first pin itself. Getting this off-by-one is a common mistake that either fries the fan or leaves it dead, so it's worth double-checking against a GPIO pinout diagram before powering on.
3️⃣ Prep the SSD storage
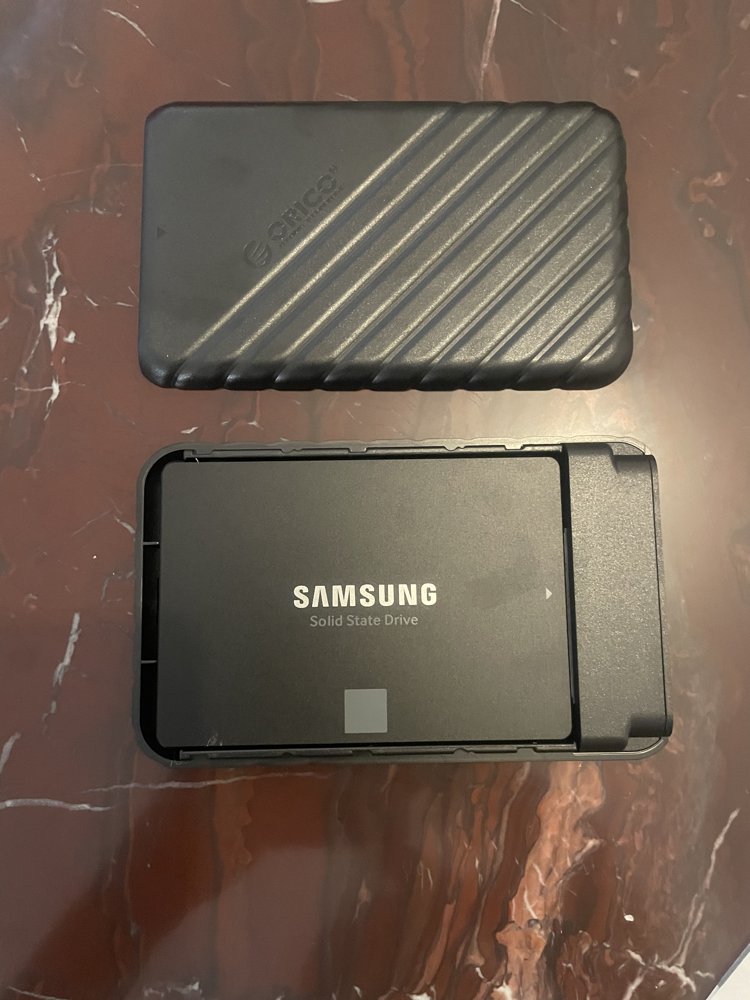
With the Pi itself buttoned up, next was the storage side: the Samsung 860 EVO 500GB SSD and the ORICO 2.5" USB enclosure it lives in.
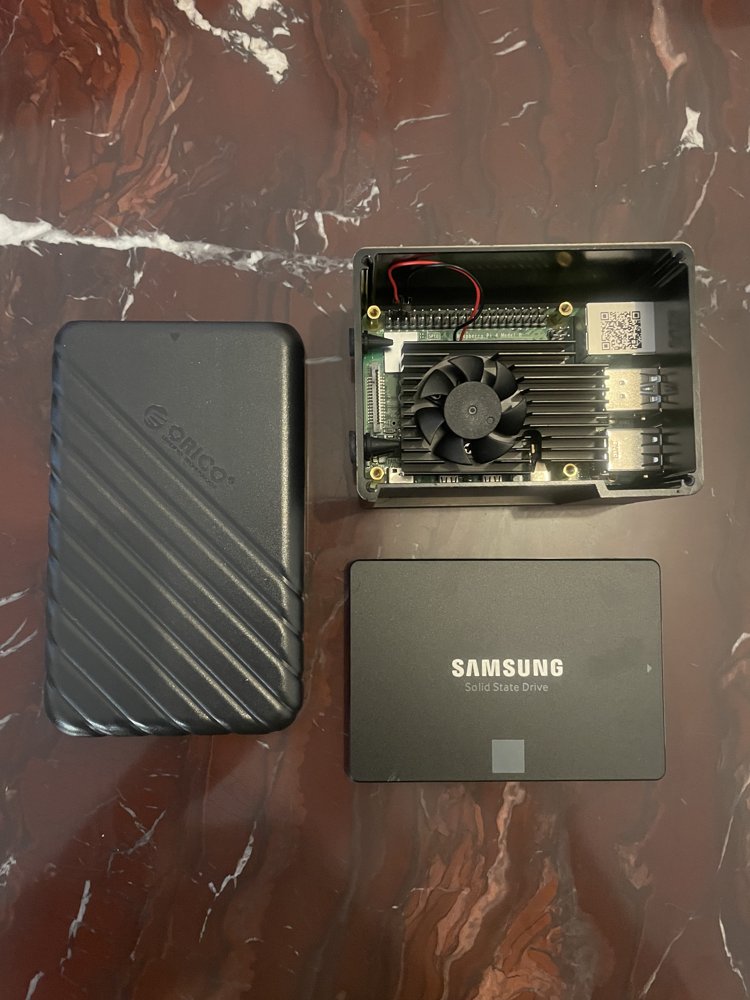
The SSD slides into the enclosure's tray and locks in with the connector at the end — no tools or screws needed for this particular enclosure.
4️⃣ Connect the SSD to the Pi
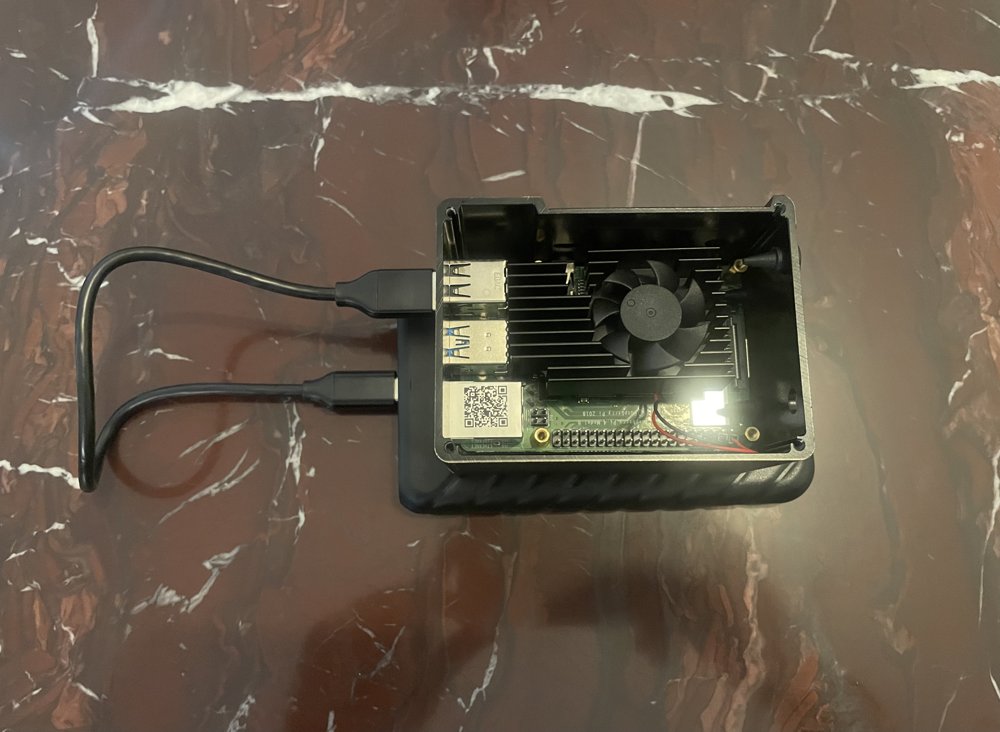
Enclosure closed up, then connected to one of the Pi's USB ports via the USB-C to USB-A cable. This is what will carry all the Nextcloud data once the software stack is running.
5️⃣ Start flashing the OS
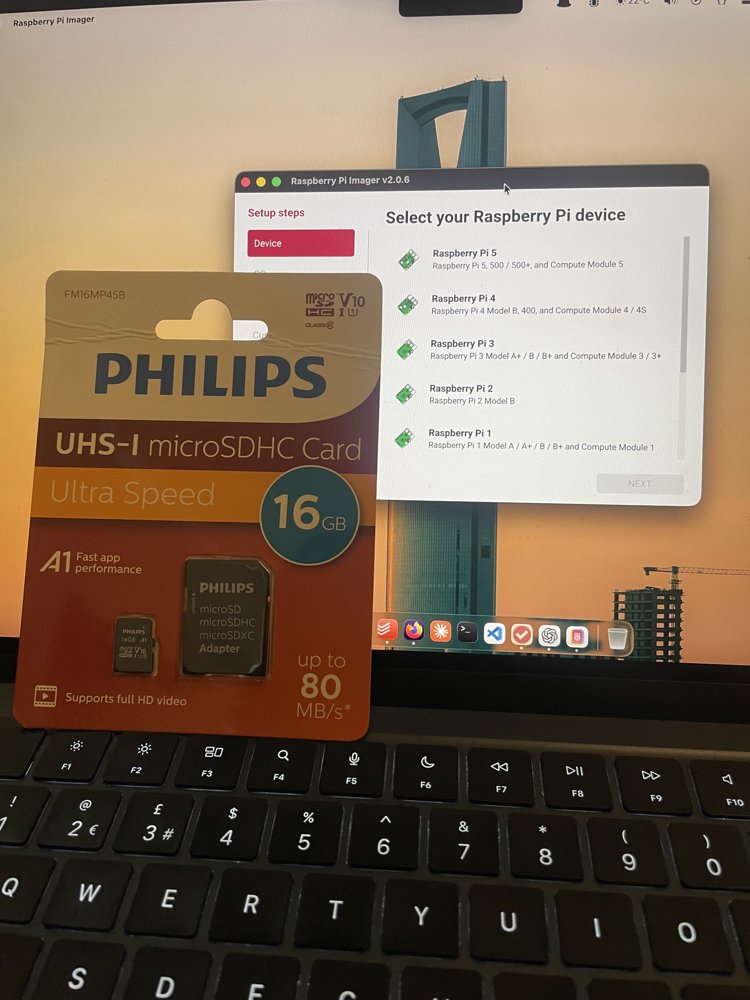
Over on the laptop, Raspberry Pi Imager (v2.0.6) was opened to write the OS onto the Philips 16GB microSD card. First step in the wizard: selecting the device — Raspberry Pi 4 — before choosing the OS image and target storage.
✅ Update
Day 2 picked up right where this left off — see below.
📅 Day 2 Progress
✅ Completed today
- SSH'd into the Pi for the first time from the laptop
- Set a memory/kernel config option needed before cloning
- Installed the rpi-clone tool
- Cloned the OS from the microSD card over to the SSD — no more relying on the SD card
- Set the Pi to boot from the SSD/USB instead of the SD card via
raspi-config - Completed OS migration and boot configuration, ready for application deployment
🔗 Resources used today:
- 🧬 rpi-clone by Jeff Geerling — the tool used to clone the OS from the SD card to the SSD, referenced for Steps 3–4 below
1️⃣ First SSH login to the Pi
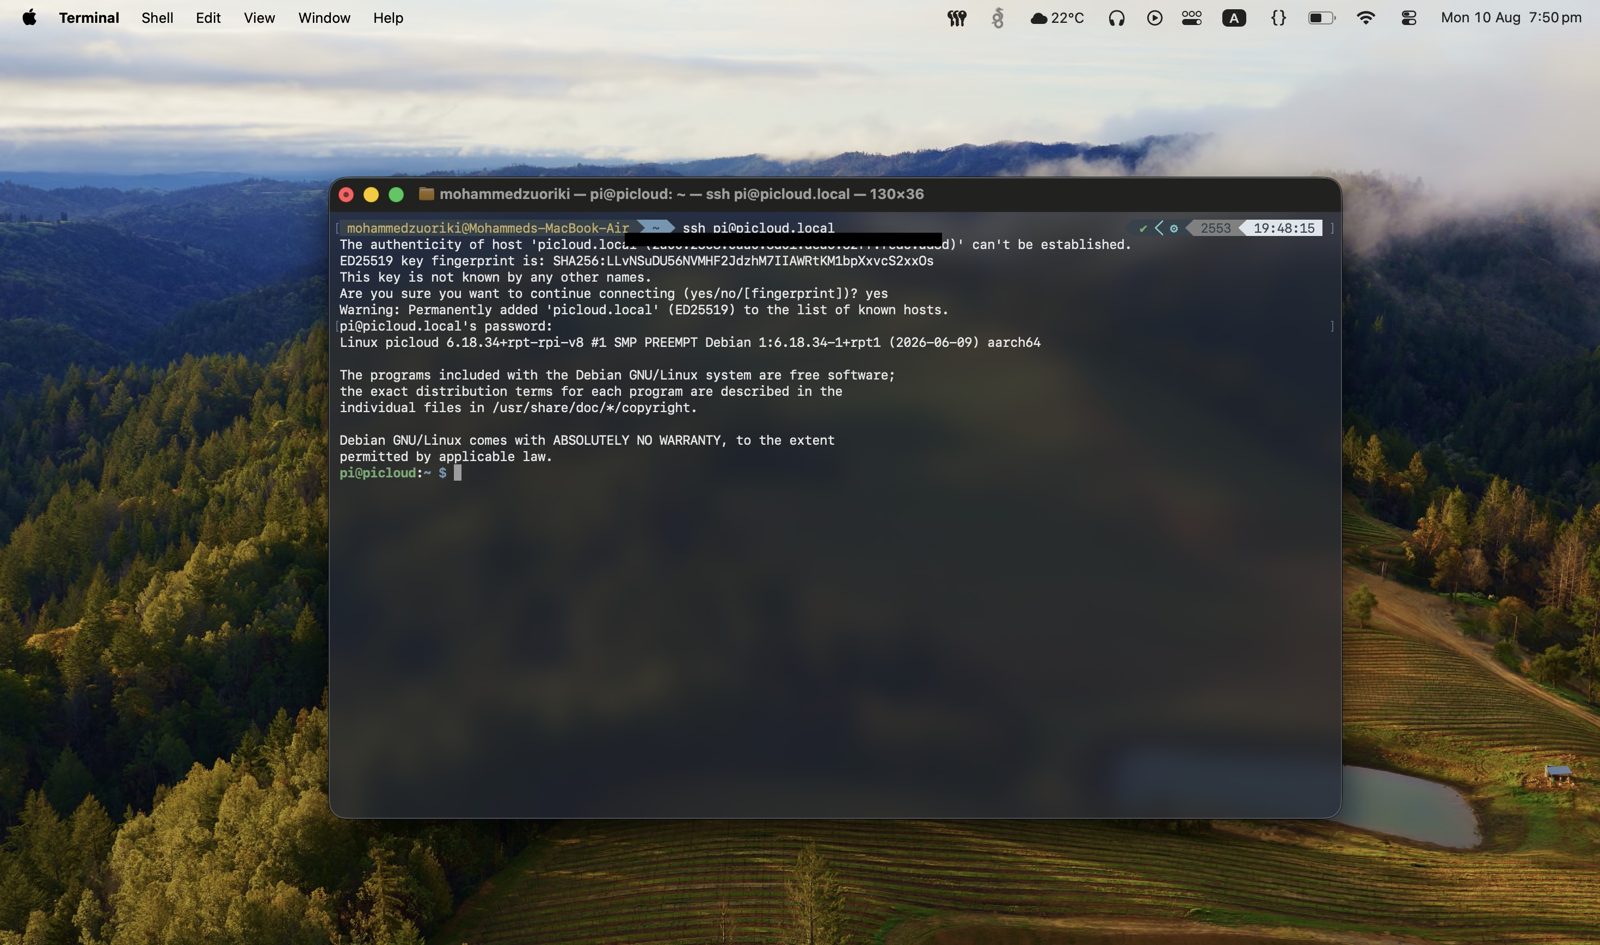
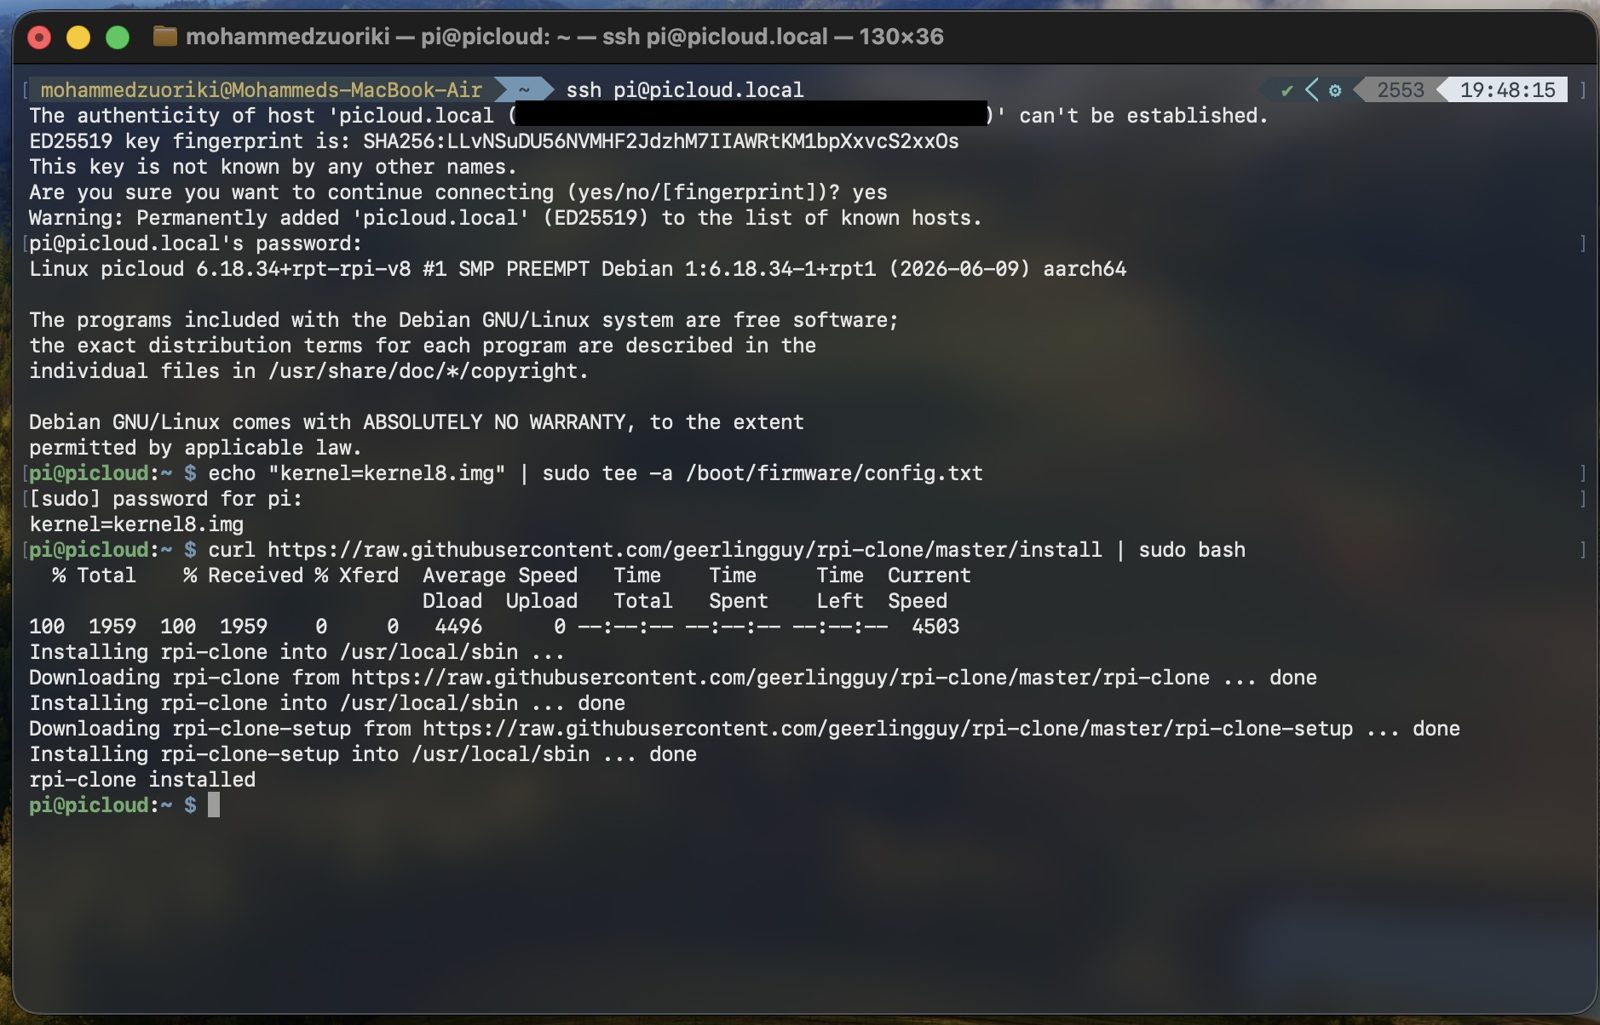
With the OS flashed and the Pi booted, the first connection was made from the laptop over SSH:
ssh pi@picloud.local
The very first connection to a new host prompts for a host key check — this is SSH confirming it's really talking to the Pi and not something impersonating it. Typing yes accepts the fingerprint and adds the Pi to the laptop's list of known hosts, then it drops into the Pi's shell after the password prompt.
🔒 IP addresses redacted
The Pi's IPv6 address briefly appears in the SSH host-key prompt in these screenshots — it's been blacked out here since it's identifying info tied to the home network, same as the IPv4 address redacted further down this page.
2️⃣ Set the memory/kernel config
Before cloning, one config line was appended to the Pi's boot config to make sure the correct 64-bit kernel is referenced:
echo "kernel=kernel8.img" | sudo tee -a /boot/firmware/config.txt
Then rpi-clone — the tool that will handle copying the OS over to the SSD — was installed straight from its GitHub repo:
curl https://raw.githubusercontent.com/geerlingguy/rpi-clone/master/install | sudo bash
3️⃣ Identify the SSD before cloning
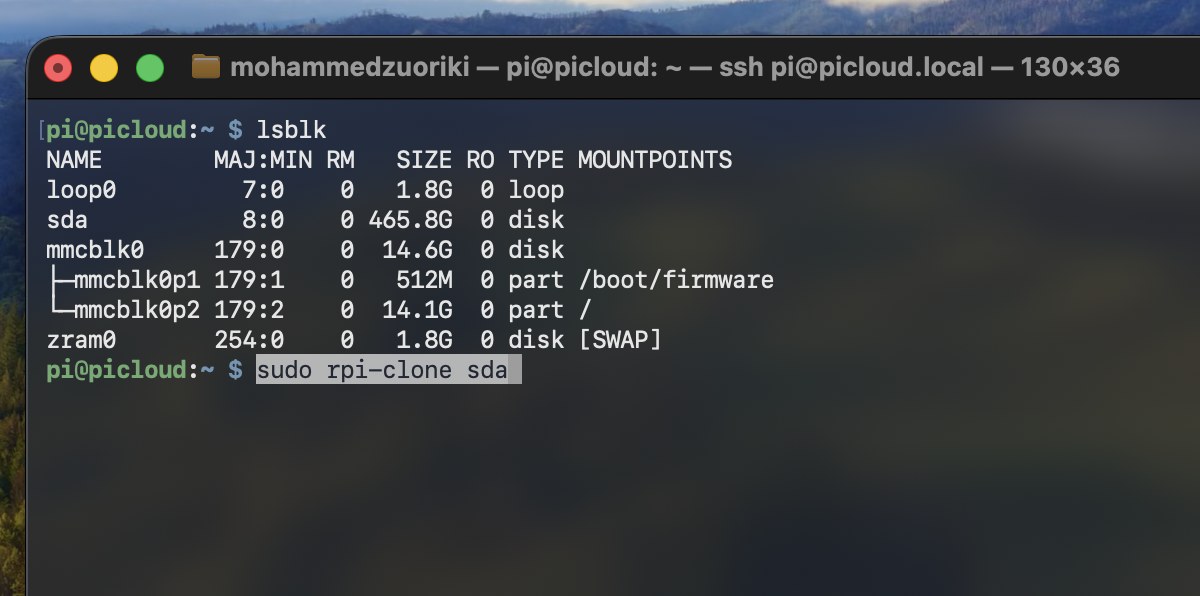
lsblk lists all attached storage so the correct target disk can be confirmed before doing anything destructive — the SSD shows up as sda (465.8G), separate from the SD card mmcblk0 (14.6G, currently holding /boot/firmware and /):
⚠️ Double-check the target disk
rpi-clone overwrites everything on the destination disk. Confirming with lsblk first that sda is really the SSD (and not, say, an accidentally-plugged-in USB stick) is a step worth never skipping.
4️⃣ Clone the OS from SD card to SSD
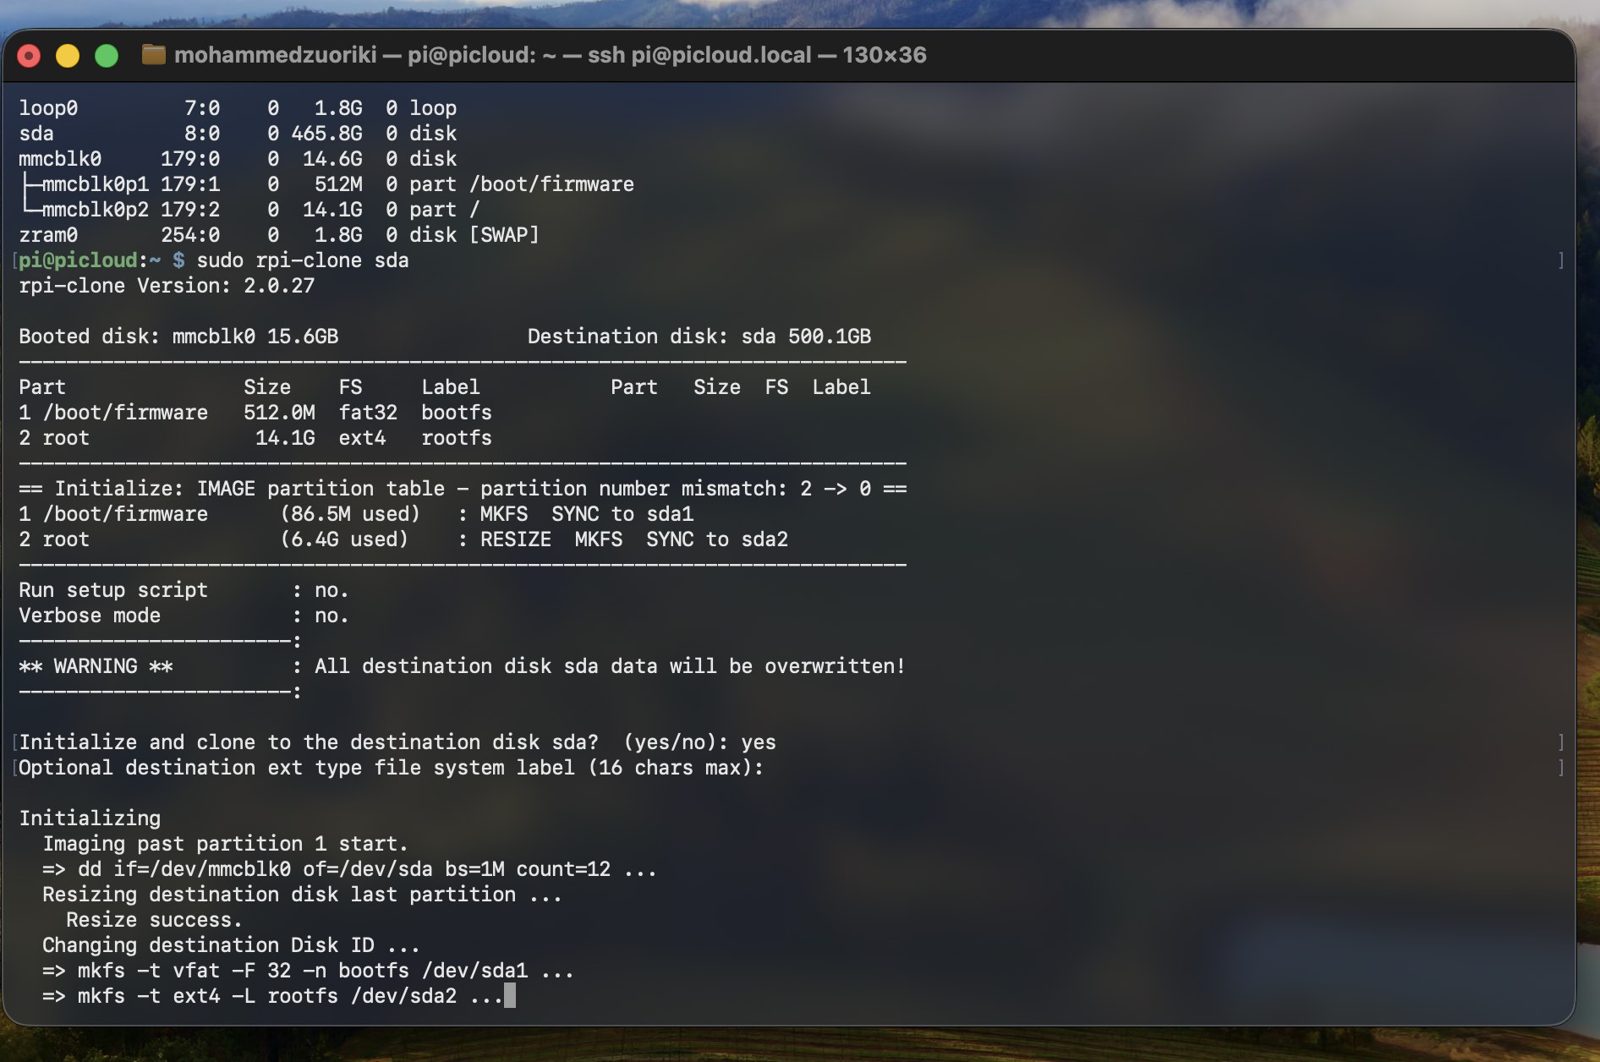
sudo rpi-clone sda
rpi-clone shows a summary of both disks, warns that the destination will be completely overwritten, and asks for a final confirmation before doing anything:
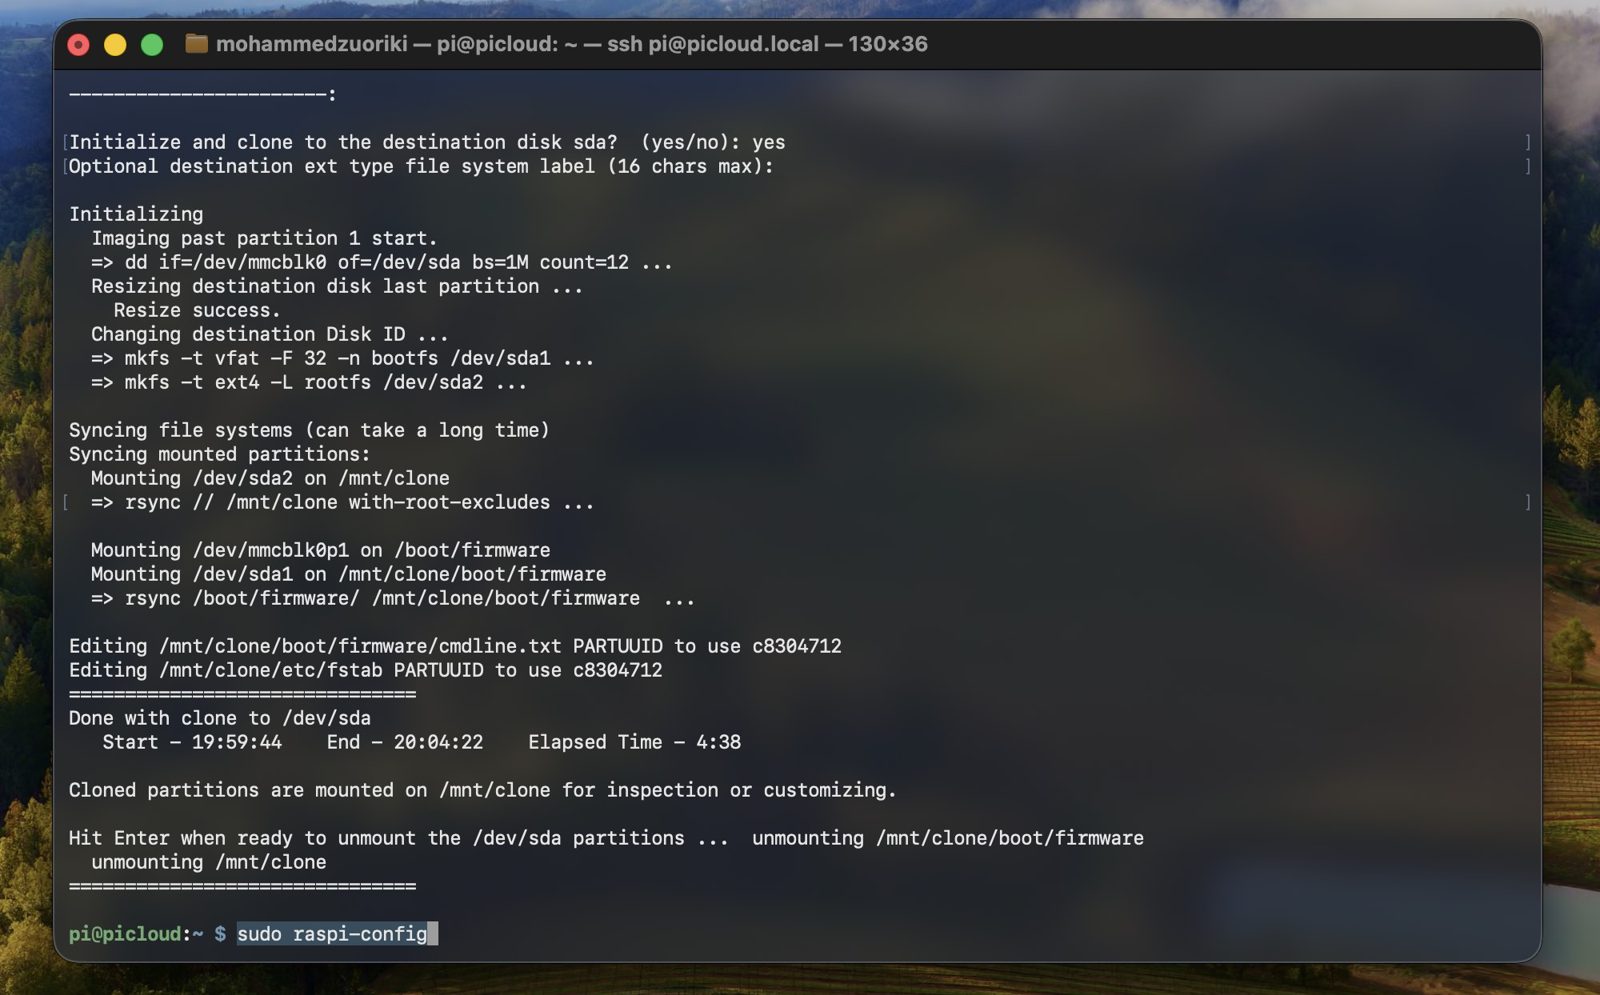
It then formats the SSD's partitions, syncs every file across, and fixes up the partition UUIDs so the SSD can boot independently. This run took about 4 minutes 38 seconds:
5️⃣ Set the Pi to boot from the SSD
With the clone done, sudo raspi-config was opened to change the boot order — otherwise the Pi would keep booting from the SD card out of habit, even with a perfectly good clone sitting on the SSD.
Advanced Options:
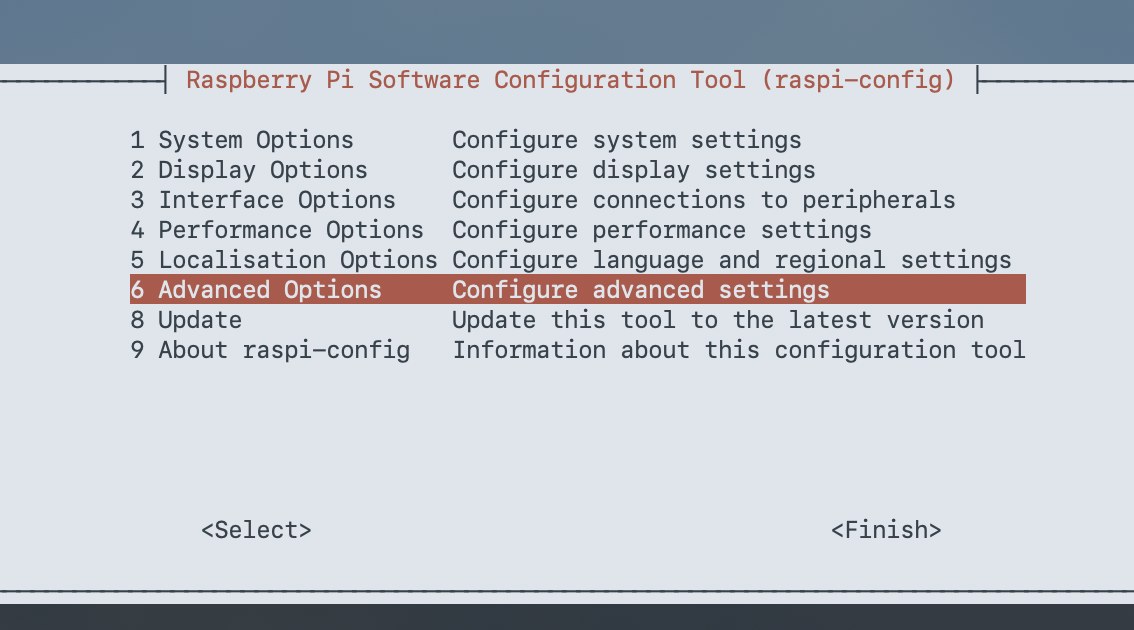
→ Boot Options → B2 NVMe/USB Boot:
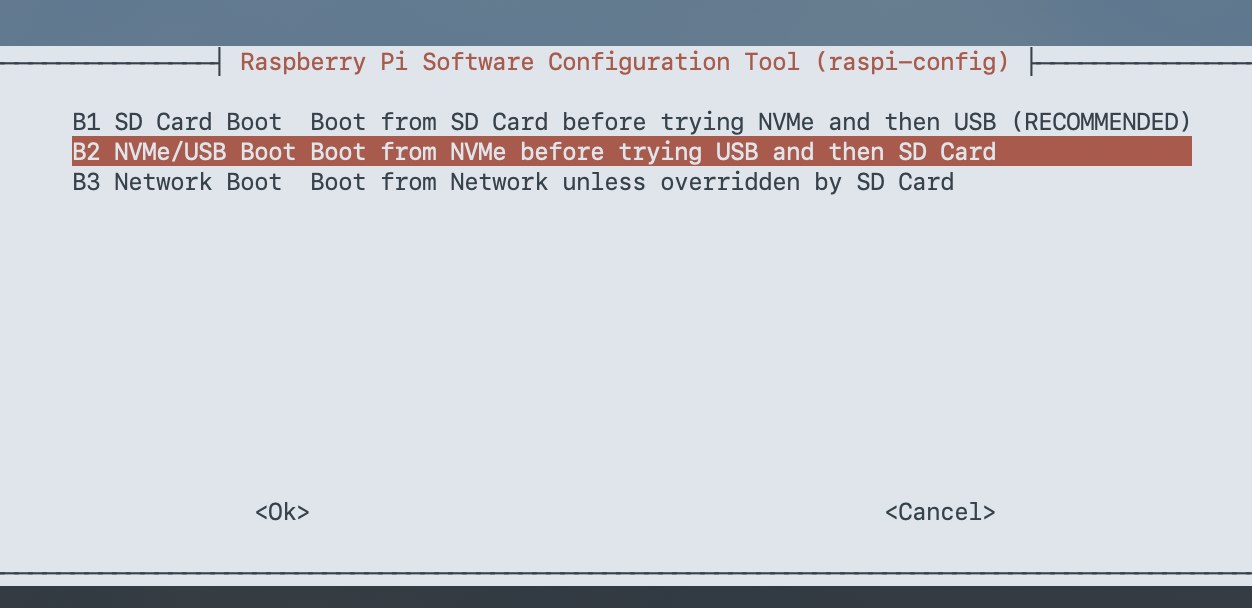
This tells the Pi's firmware to look for a bootable OS on USB/SSD first, falling back to the SD card only if nothing's there. After this, the SD card can eventually be removed altogether.
⏭️ Next stage moved
The Nextcloud setup and first-run application deployment steps are now documented in Nextcloud Deployment.
⏭️ Next up
Still to come: setting a static IP/DHCP reservation so the address doesn't change, HTTPS via a reverse proxy, adding MariaDB and Redis in front of Nextcloud's default setup (see Requirements), and eventually remote access from outside the home network — covered in Nextcloud Deployment and Network & Remote Access.
🧾 Build Log
| Date | Milestone |
|---|---|
| Day 1 | Case opened, cooling fan mounted and wired, SSD seated in enclosure and connected to Pi, OS flash started |
| Day 2 | First SSH login, cloned OS from SD card to SSD with rpi-clone, set boot order to SSD, completed base system preparation for Nextcloud deployment |
More to come
This page will keep growing day by day as the build continues — static IP, MariaDB/Redis, HTTPS, and remote access are next.